


July 2015 - During the strip down process particular attention was paid to the positioning of the wiring loom and the various electrical connections such as those to the fuse box and voltage regulator. I also copied a wiring diagram from the workshop manual and coloured the cable traces accordingly to help with visual recognition. The connections and some of the electrical items looked quite grubby. I therefore decided to get a ready made loom from Autosparks, which I requested be adapted to include connections for a hazard light set up.

The main instrument cluster and indicator stalk had suffered. I was lucky to get a NOS indicator stalk & the cluster cleaned up & the housing got a respray.

The other switches for the heater and wipers are standard Lucas units and have been replaced with new ones. The floor mounted dip switch has also been replaced with a new unit.

A subtle hazard light switch will be fitted to the dash, along with an ammeter. My Father had already fitted an oil pressure gauge.

A new choke cable, ignition switch & oil pressure gauge fitted to the dash. The windscreen wash mechanism is a simple push button plunger affair.

As each item was stripped it was useful to bag up the fittings and find decent replacements. I used metric brass fittings where possible. Main components fitted include the flasher relay, starter solenoid, coil & HT lead, Fuse box & voltage regulator. At this stage the wiring loom has not been fitted & the heater matrix is out.

May 2017 - The new wiring loom is laid out in bid to understand what goes where. Most of the connections of the old loom were labelled on removal in order to aid this process. The new loom has some subtle differences to the original so the process of labelling the connections on it helped understand the layout & what types of connections were fitted. With this done the loom is dropped into the engine bay and fed through the bulkhead hole to the windscreen pillar. It passes up along the drivers side beneath the headliner then down the rear pillar into the boot to the lights and across the boot to the other light cluster and fuel sender. Conveniently, the new loom comes in two parts to aid any future work on the engine bay electrics.
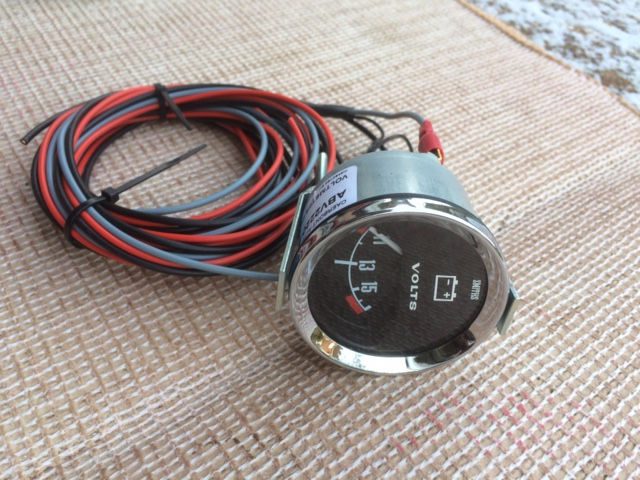
FEB 2018 - I have decided to fit a simple volt meter rather than an ammeter, as the latter would involve more serious surgery on the sealed up wiring loom. My Brother had a nice spare and got the wiring made. I will check the style of bezel and if necessary change it to match that of the fitted oil pressure gauge.

And whilst the Volt meter was being wired the attachments for the push button hazard switch have been soldered onto the various contacts.

The hazard switch proved to be extremely problematic. The number of connections on the rear meant that some form of cross feed was occurring during operation that interfeered with the direction indicators. In the end it was easier to obtain a slightly less subtle switch with eight poles on the back. The beauty of this was that once wired up a connector block could be used to fit the switch wiring directly to the new loom. With this done a full electrical test could be carried out.

The original specification horn push is wired up and popped into place.

It is now January 2019 and it is time to start the small jobs left. Some proper battery terminals have now been fitted along with protective covers.

The battery clamp is a short circuit waiting to happen. So the clamp has been encased in electrical tape before being fitted back in the engine bay.

The Lucas Type 055 battery has some adapter collars fitted to the posts and as it is kept on maintenance charge, is ready to be fitted as required.
With the hazard switch relay mounting clip glued near the fuse box, and the relay popped in, the work on the electrical system has concluded !